• Skip to main content
  • Skip to primary sidebar
  • Skip to footer

Universities of Wisconsin Office of Online and Professional Learning Resources

Main Navigation

  • Home
  • Who We Are
  • Campus Partnerships Open Sub Menu
    • Online Program Development
      • Integrated Marketing
      • Recruitment
      • Retention and Student Services
      • Instructional Design
      • Learning Technology and Media Services
    • Continuing Education Executive Council
  • For Students Open Sub Menu
    • Independent Learning
    • UW Online Collaborative Degree Programs
    • UW Flexible Option
  • Contact Us

Return to Main Navigation Top.

Home / Blogs / Instructional Design

Instructional Design

Boundaries, Time, and Teaching Online

By Kristin Kowal
August 13, 2019

Posted in: Best Practices / Faculty / Teaching Online / Tips

August 13, 2019

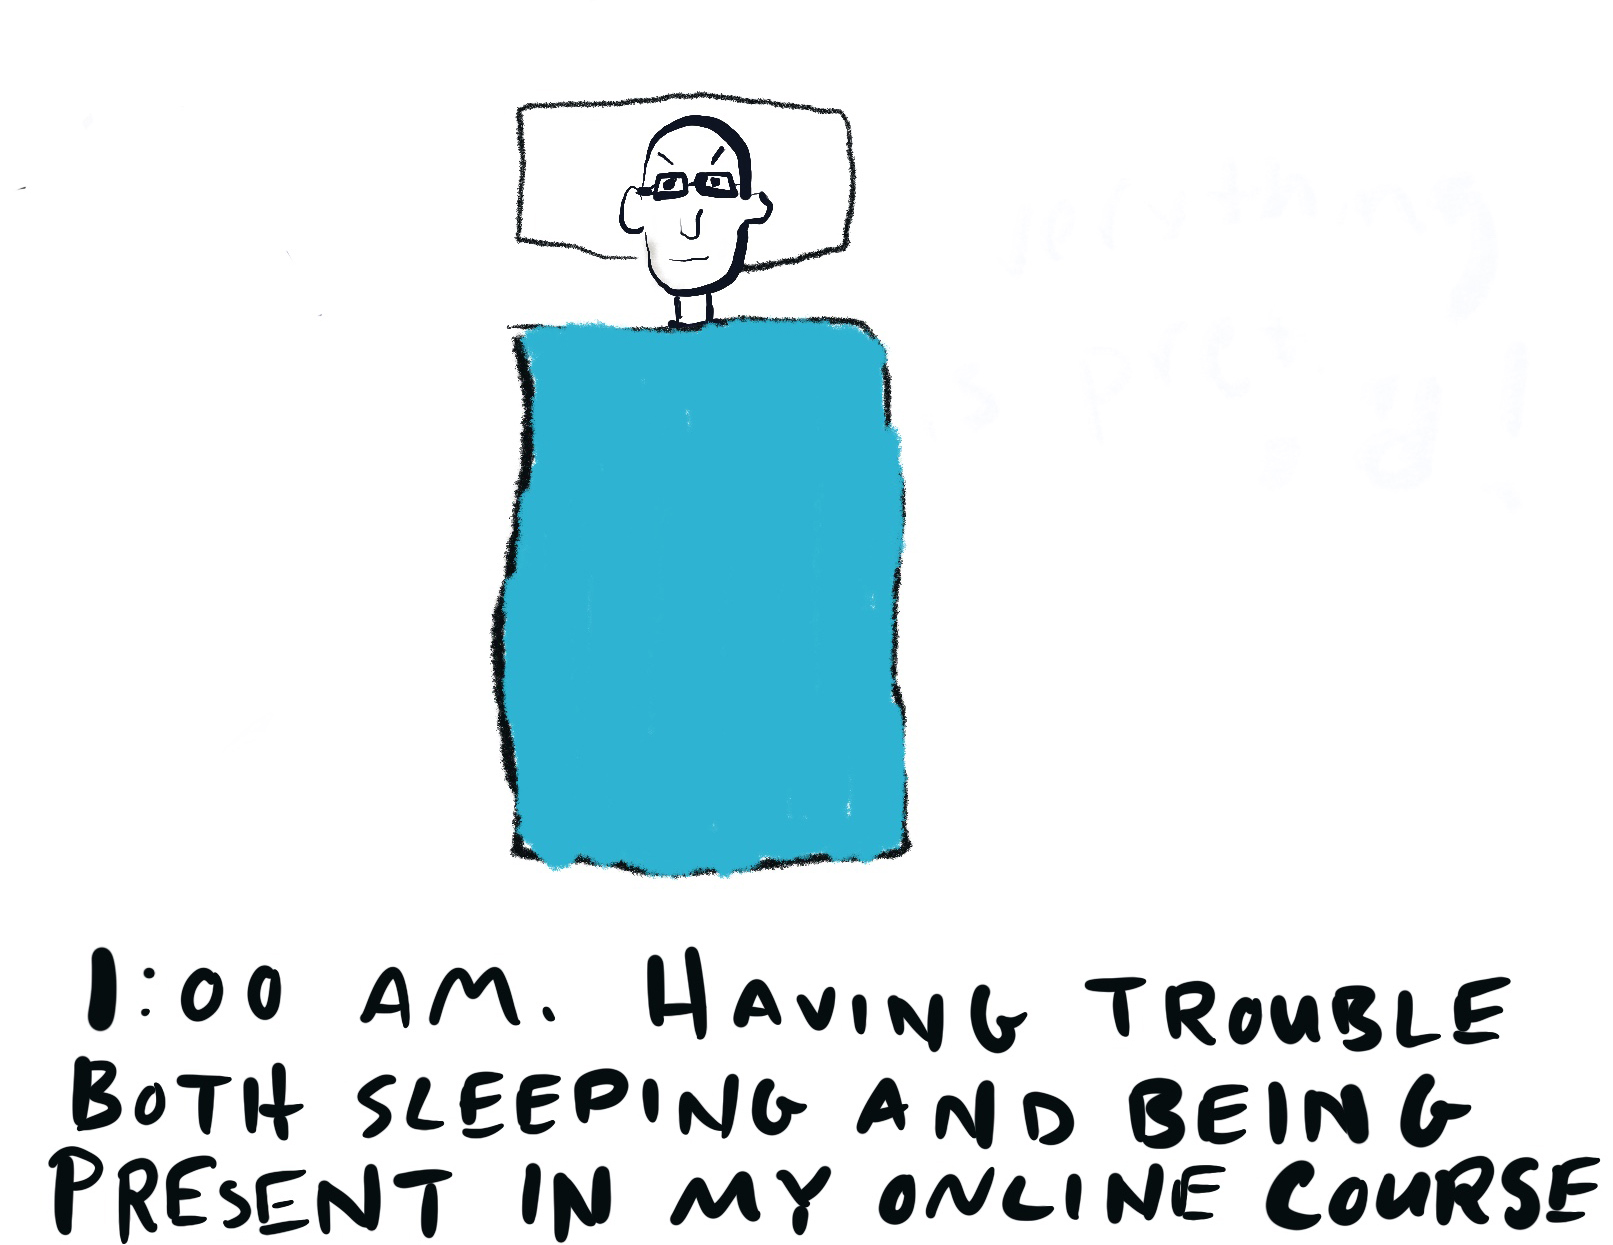
If you sometimes feel like your course is taking over your life, you’re not alone. Does this sound familiar:

Some weeks I spend way too much time on my online courses. Some weeks I do not spend enough time on my online courses. Please remember we all teach courses in >1 program, including our home campus responsibilities, with both in-person and online modalities!

No matter how prompt you are or how much time you dedicate as an instructor, there is never enough time to do everything you should or could. I try to find ways to automate things, but that even takes some time.

What I find difficult is that students, because they tend to work all hours all seven days, will ask questions 24/7. I feel like they expect me to be constantly monitoring my email. I like to take the evenings and weekends off (call me crazy), and that makes me feel guilty.

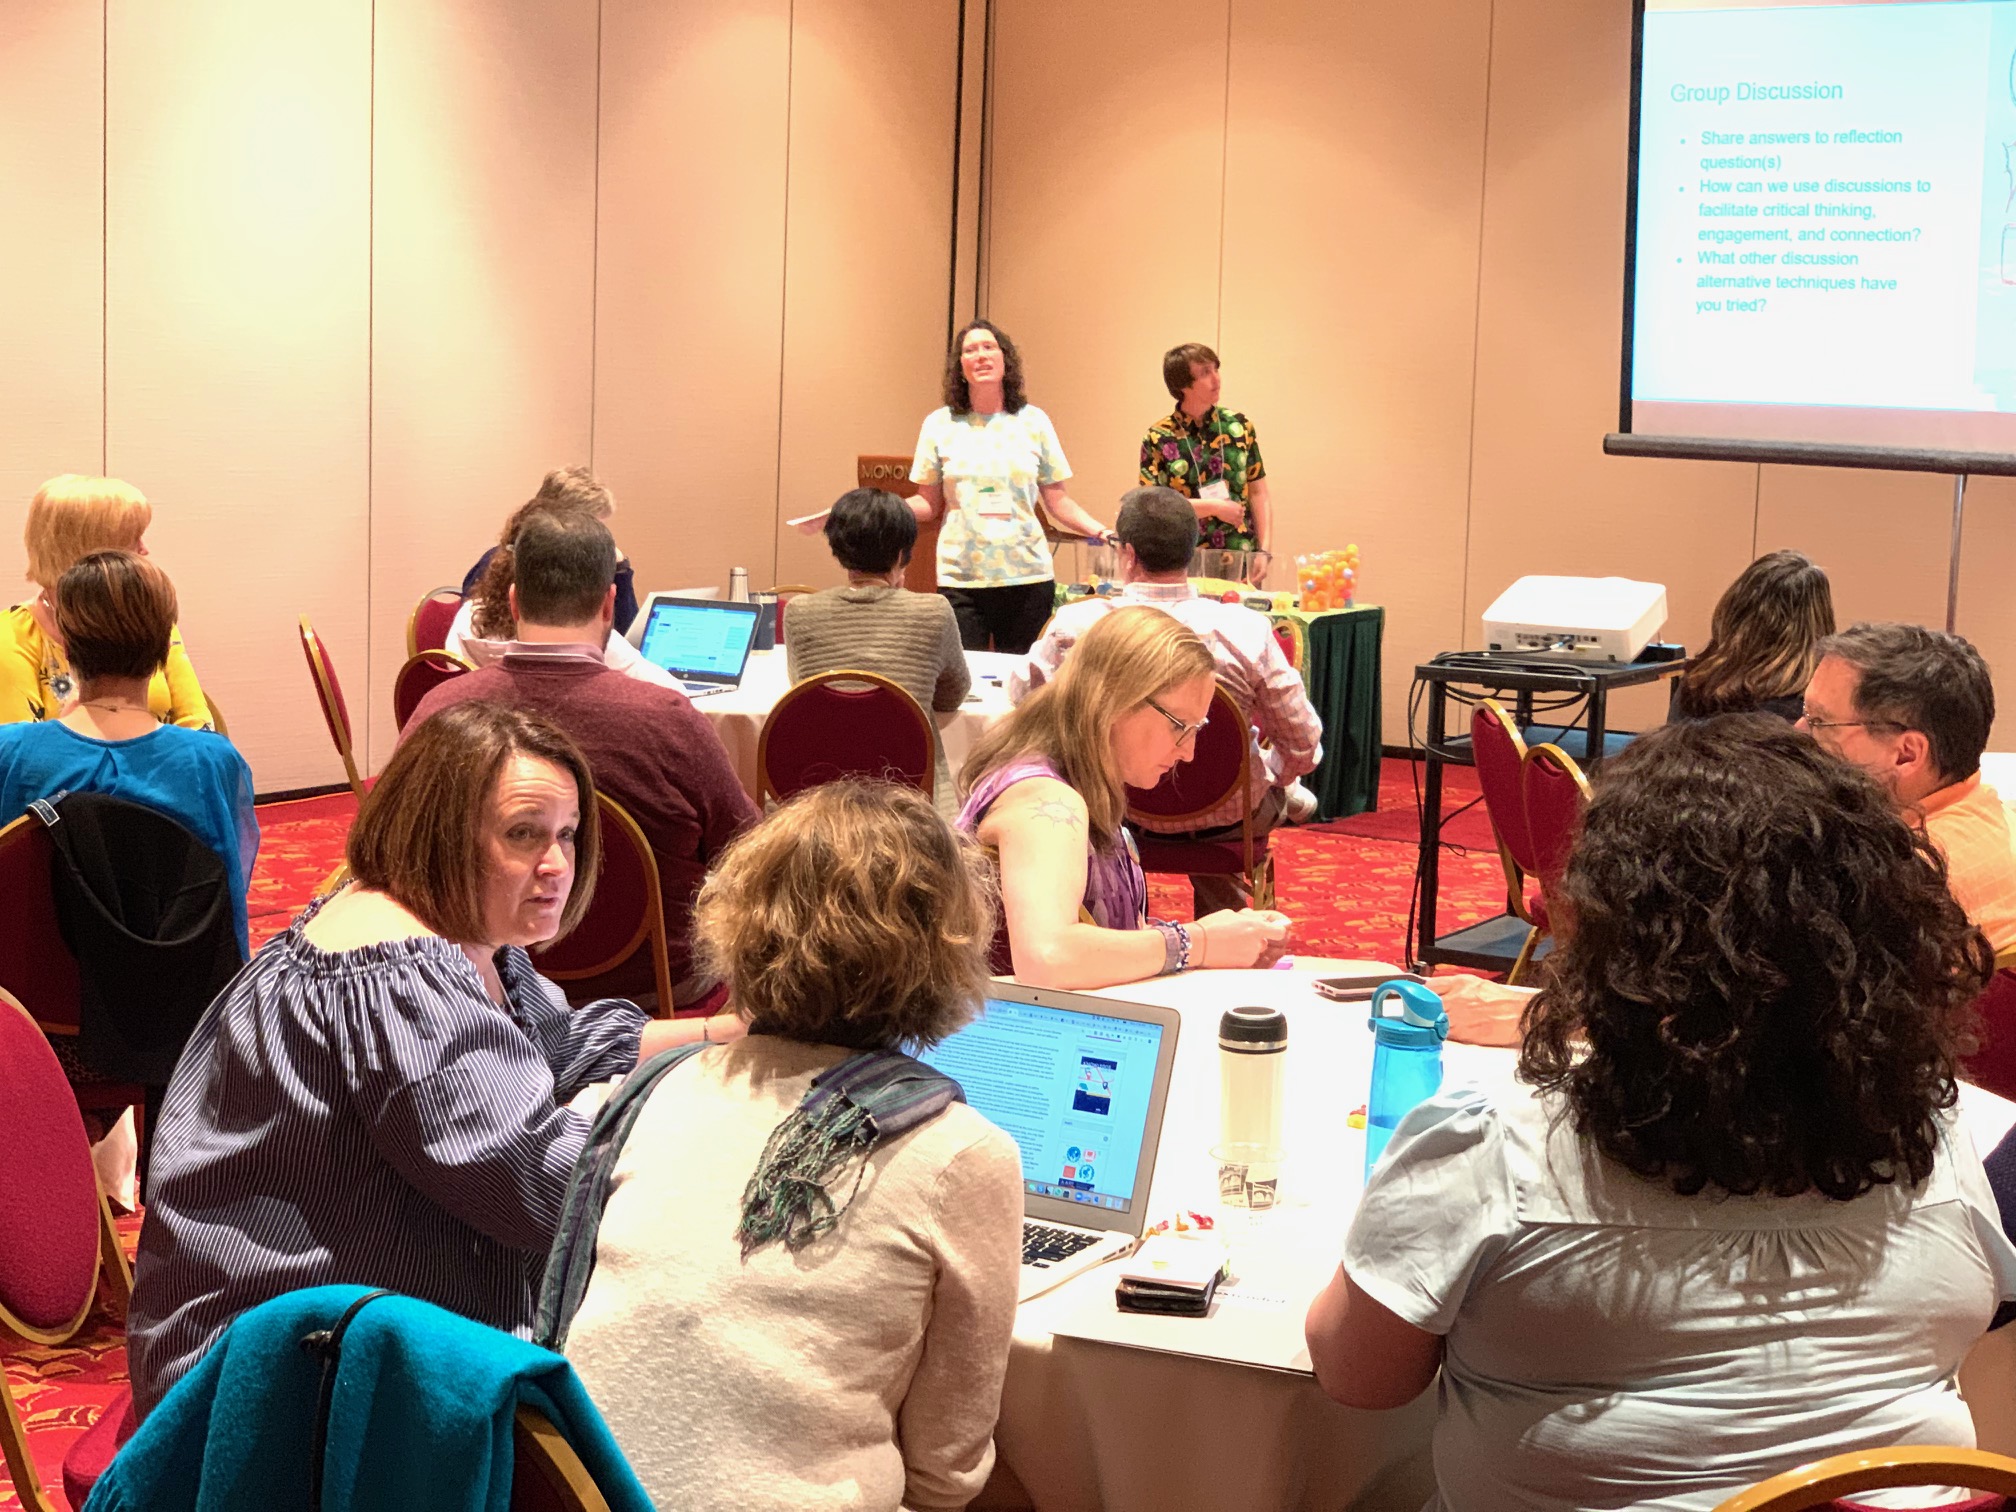
These are some of the answers I got to the question, “What do you find the most difficult about teaching online?” When instructional designers like myself meet with an instructor for the first time, it often goes like this:

A cartoon of an instructional designer and a faculty member having a conversation. The ID says "Okay, so the most important thing to remember is to be present in your course and give timely feedback." The instructor says, "Sounds good to me."
A well-intentioned ID encourages a new faculty member.

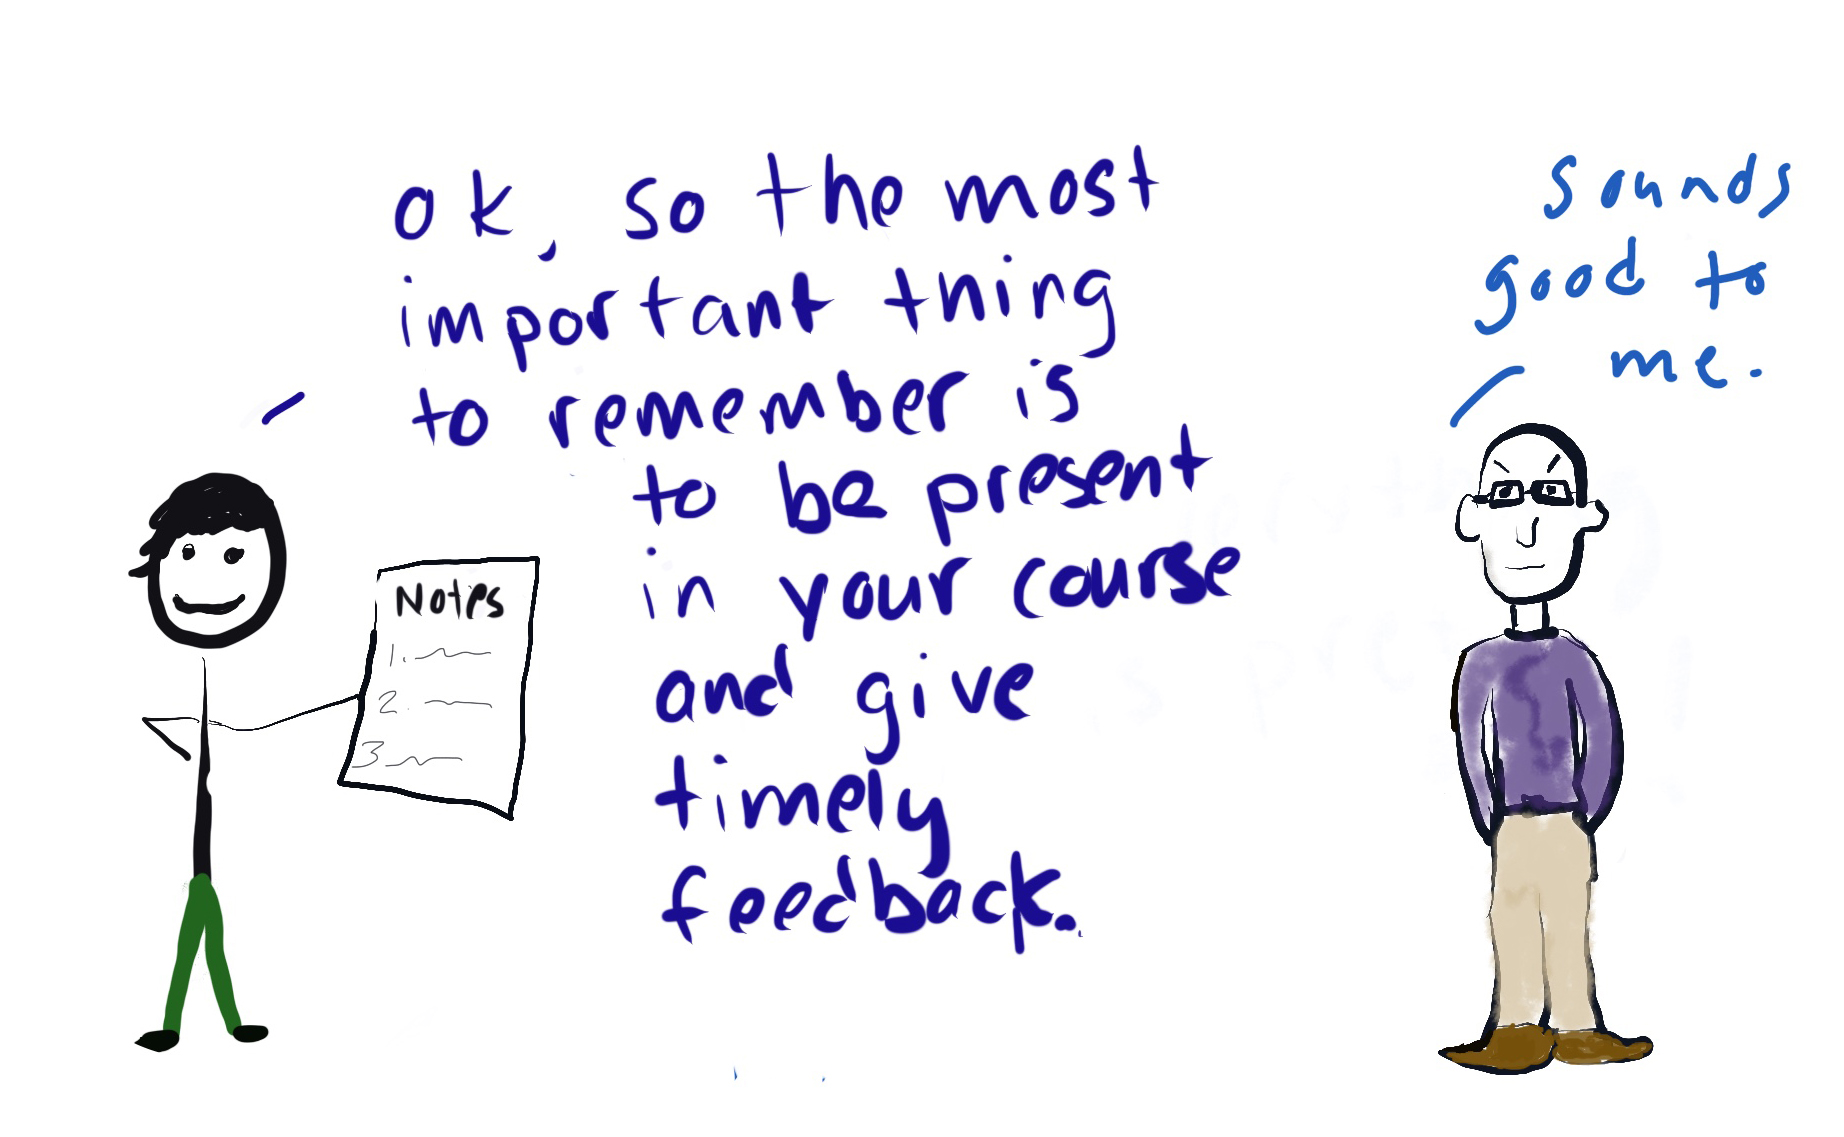
However, the well-intentioned ID might not imagine this reality during that conversation:

A cartoon of the instructor sleeping in his bed and thinking, "1:00 a.m. I'm having trouble both sleeping and being present in my online course"
Hopefully, this cartoon is a hilarious exaggeration and your online course isn’t keeping you up at night, but can you relate?

What’s the answer to this problem of no boundaries naturally existing in the “Anytime, Anywhere” model of online education? As a faculty-designer team, we cannot manufacture more time in the week. What can we do to achieve a healthy work-life balance in the online classroom?

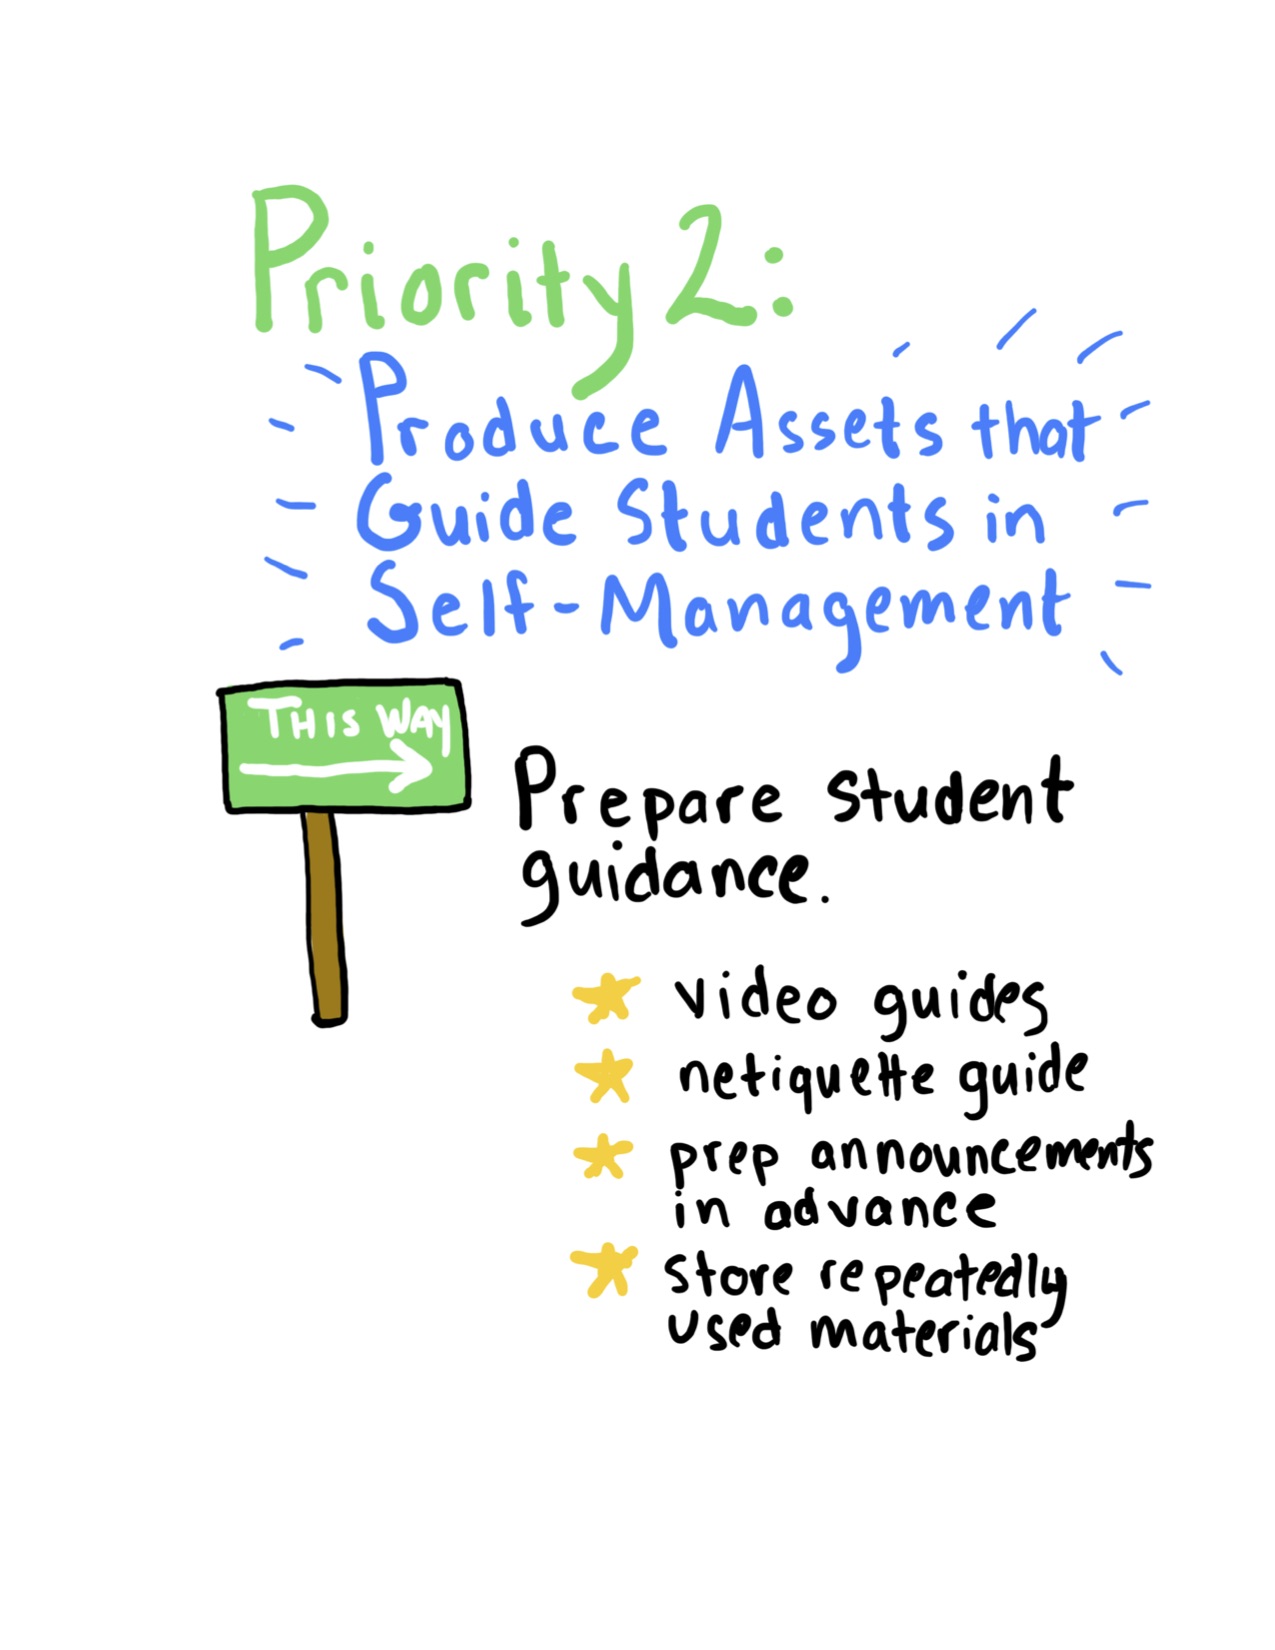
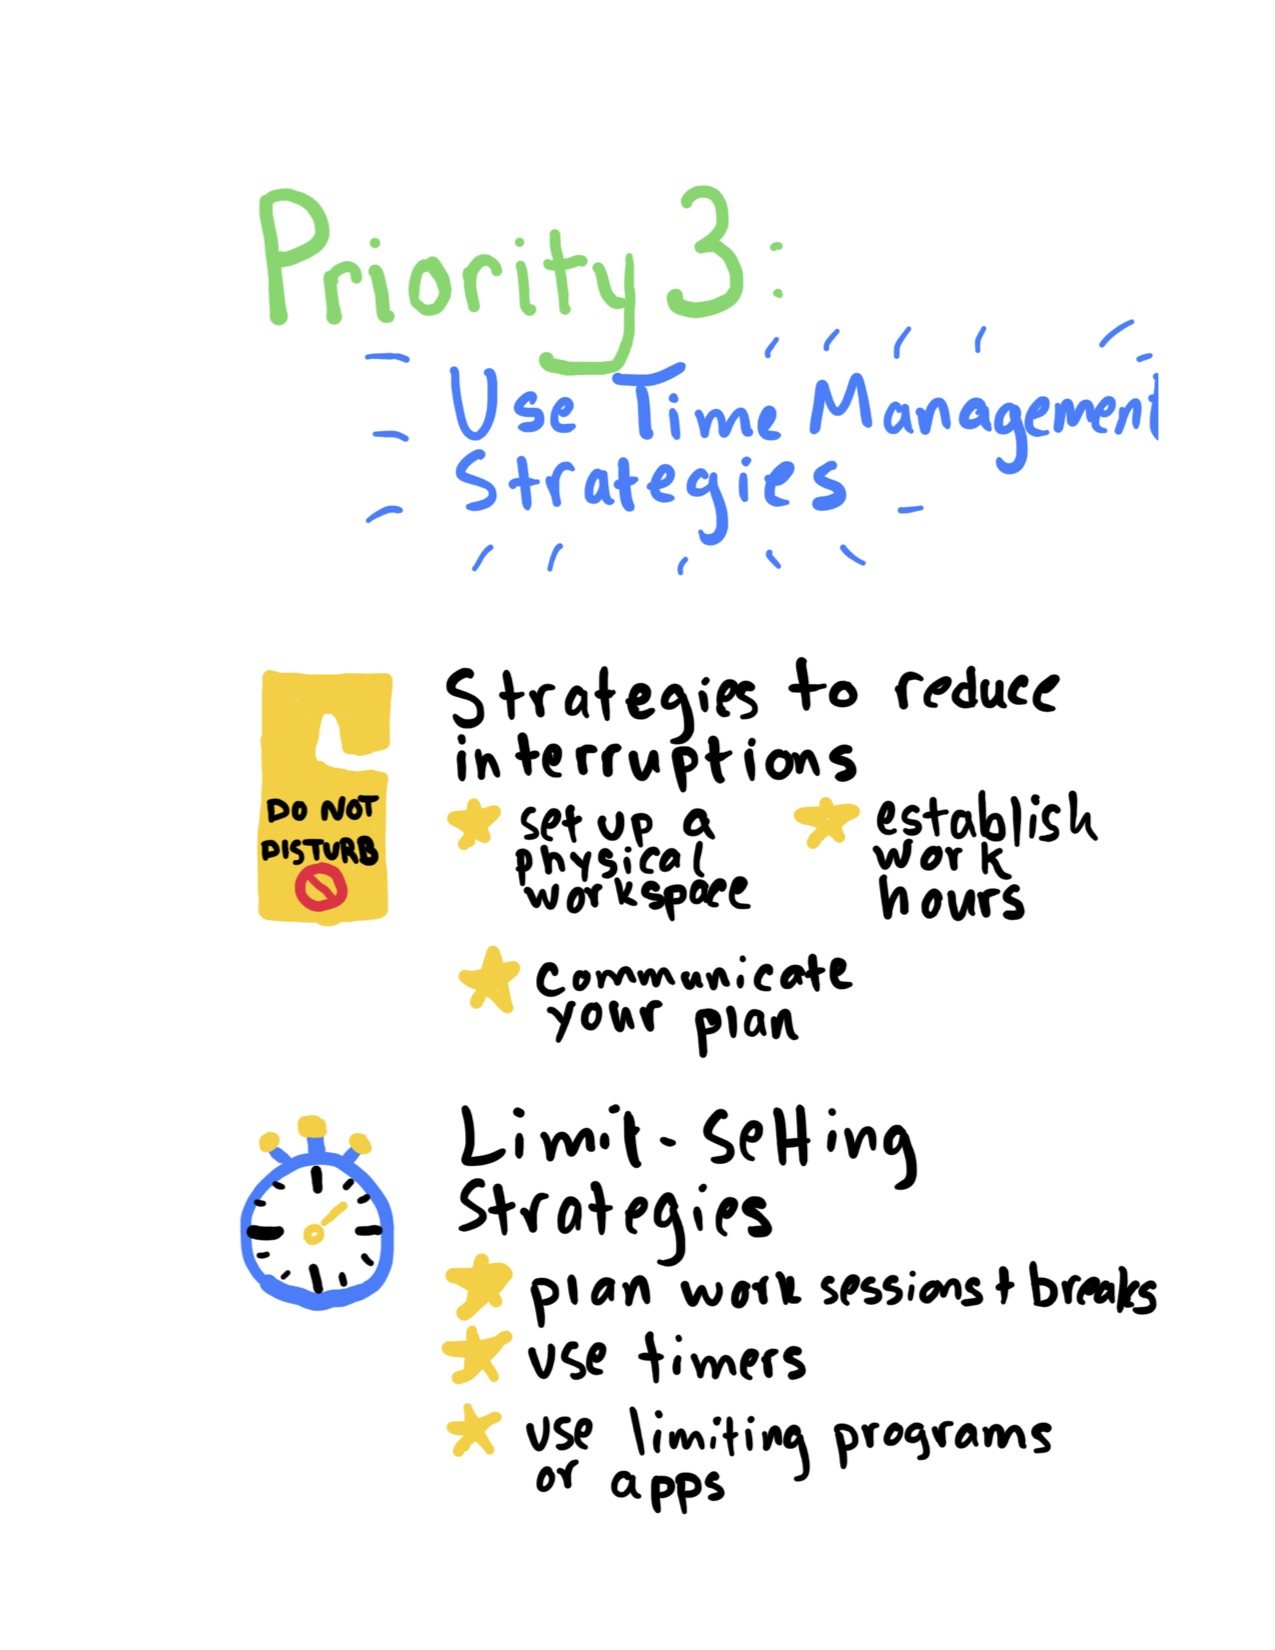
Tips from a Journal Article

I looked for journal articles that applied to this issue, and I found one article from the Journal of Educators Online that I wanted to highlight called Creating Boundaries within the Ubiquitous Online Classroom1. If you have the time, I suggest reading the entire 21-page article. The authors briefly explain the theory of andragogy and the Community of Inquiry framework and then use them to support some time-saving strategies. They also highlight some efficiency tools that might save you time. If you don’t have time to read it, here is a summary of their tips and tricks. The article suggests setting three “priorities” as I illustrate below. (Click on an image to enlarge it.)

Heading: Priority 1: Engage With Students First. 3 Tips are listed: Post Early. Keep Ancedotal records, and practice backwards mapping. Heading: Priority 2: Produce Assets that Guide Students in Self-Management. Tip: Prepare Student guidance. Examples: Video guides; netiquette guide; prep announcements in advance; store repeatedly used materials Heading: Priority 3: Use time management strategies. Strategy 1: Strategies to reduce interruptions: Set up a physical workspace; establish work hours; communicate your plan. Strategy 2: Limit-Setting Strategies: plan work sessions and breaks; use timers' use limiting programs or apps

What UW Extended Campus Faculty-Designer Teams are Doing

After reading the research article, I realized we are already implementing these strategies in course design; this is why course design can seem like such a heavy lift upfront. Here are some of the strategies we as faculty-designer teams have used that help create a healthy work-life balance:

  • Creating boundaries through office hours
  • Using rubrics to grade more efficiently
  • Generating automatic feedback through quizzes, practice activities, etc.
  • Providing examples through multimedia or text to guide students when the instructor isn’t present
  • Using technologies like the Canvas Teacher App, Speedgrader, Turnitin for efficiency
  • Leveraging Peer Review and Group Assignments to save time (though the design time can be on the heavy end!)
  • Saving announcements/pre-writing announcements
  • Using and re-using just-in-time videos to clarify course concepts and provide help
  • Posting “weekly wrap up” announcements to provide a feeling of closure and continuity before moving on to the next unit
  • Finding opportunities during the course revision process to implement (e.g., cutting down on weekly discussions when one isn’t needed every week). 

We want to hear from you!

Even though I see evidence that faculty-designer teams are employing time-saving strategies to set boundaries and manage time, I realize it’s not a perfect solution; instructors still struggle with work related to their online courses creeping into their personal time. We would love to hear your stories and strategies you would like to share.

Comment on this post or email me at kristin.kowal@uwex.edu on what you’ve tried and learned about time management, setting boundaries, and teaching online!

1Hansen, B., & Gray, E. (2018). Creating Boundaries Within the Ubiquitous Online Classroom. Journal of Educators Online,15(3). doi:10.9743/jeo.2018.15.3.2

Faculty Symposium: Feedback, Discussions, Revisions, and Introduction Videos, Oh My!

By Kristin Kowal

Posted in: Best Practices / Faculty / Instructional Design / News / Projects / Teaching Online / Tips

August 13, 2019

UW Extended Campus held its third annual faculty symposium this year in Madison, Wisconsin, on June 3 and 4. The instructional design and multimedia teams had a blast presenting our breakout sessions. While we can’t re-create the warm, fuzzy feeling of mingling and sharing ideas with our faculty in a blog post, we can at least share our presentation materials.

Connections and Reflections: Feedback in Canvas

Session Overview

A group activity during the Connections and Reflections breakout

Instructional Designers Stephen Beers and Eric Peloza chose this topic because it was focused on tools in Canvas, and it was timely and relevant because many of our faculty are just getting started in Canvas; Stephen and Eric also chose the topic because they wanted to highlight how important and influential faculty are in the student experience.

It was great to hear faculty share their feedback and knowledge of Canvas and its tools. For example, one faculty member mentioned how they used the mute feature, which many faculty found beneficial. Overall it was a lot of fun, and I enjoyed the unique questions and topics that came out of each session. —Eric Peloza, Instructional Designer


Main Takeaways

I asked Eric Peloza about his main takeaways of the presentation. He highlighted four:

  1. Yes, feedback does matter. Our teams hear about the wonderful job our faculty do with feedback and how much students value feedback.
  2. The frequency and timing of feedback matters. This is a challenge for faculty and the good news is that Canvas has tools that faculty can leverage. Course level reports (course analytics) and announcements are great ways to reach or review the class as a whole. Templated feedback is another great way to help faculty. Using rubrics or automatic feedback in Canvas is a great way to improve the immediacy of feedback.
  3. Feedback is improved when it is specific. Canvas gives faculty options across all of assignment types in Canvas. This includes general feedback by way of text, video, or file upload, along with using specialized tools such as DocViewer in Canvas.
  4. Sometimes, questions work better than statements. This is best best leveraged in discussions. Interrogative questions can open up or keep discussion going among students. Again, Canvas can be leveraged here in facilitating feedback. Another great feature is that faculty can view all of a student’s submissions at once.

Download the Presentation Materials

You can download the Connections and Reflections: Feedback in Canvas Presentation here.

Part Deux: Discussion on the Rocks? Add a Twist of Fresh Alternatives!

Faculty connecting over how they use discussions in their courses in this group activity

Session Overview

My fellow instructional designer Laurie Berry and I presented on ways to add a little “zest” to online discussions by varying the discussion format. We reviewed the two most popular strategies that we presented at the symposium last year (you can get a full explanation of these strategies in my blog post “Five New Twists for Online Discussions”). Then, we presented three new “twists” faculty used in their course during the spring semester. There may have been some light dancing as well.

[The faculty] seemed interested in trying at least one, if not more, of the presented twist ideas. They also liked the format/layout of the presentation where it showed the traditional question and seeing how the twist can transform the question into something new without too much effort. I think they also liked seeing their colleagues’ testimonials of student engagement as well as tips and tricks for success. —Laurie Berry, Instructional Designer

Main Takeaways

Laurie summarized the key points of the presentation:

Providing the same type of discussion throughout the course multiple times can become repetitive and boring to students and faculty. Adding a twist to at least one discussion provides unique ways to get students to interact with course content and to engage with each other. Also, don’t be afraid to try something new or different with a discussion board activity.

Download the Presentation Materials

You can download the Part Deux: Discussion on the Rocks? Add a Twist of Fresh Alternatives Presentation here.

Extreme Course Makeovers

Ryan Martinez and Kristin Pierick lead a group activity in their Extreme Makeovers session.

Instructional designers Ryan Martinez and Kristine Pierick presented on a topic that nearly all instructors will encounter: how to prioritize course revision tasks. Ryan and Kristine used the metaphor of renovating a house and examples of how to pick specific projects to fit your time and budget to bring this presentation to life.

We had several faculty members express their own difficulties when revising their courses. We also shared several examples from faculty that were in the audience, so they were also able to elaborate more on our points, which was very helpful. All in all, it was also a good session because faculty were very willing to walk through some of their troubles and to also help some of the faculty who have not done a revision yet navigate some of their potential issues. —Ryan Martinez, Instructional Designer

Main Takeaways

Ryan summarized the main takeaways:

The main takeaways from our presentation are for faculty to be considerate of their time and resources when they are ready to revise a course, and reconcile what they can actually do in the time frame versus what they would like to do.

Download the Presentation Materials

You can download the Extreme Course Makeovers Presentation here.

Meet the Instructor: Building a Social Connection

Nick Meyer explains why “Meet the Instructor” videos are important.

Nick Meyer and Bryan Bortz from the media services team presented on how “Meet the Instructor” videos can build a social presence in your course. They demystified the process of working with media services to create a “Meet the Instructor” video. This session was recommended for faculty who are new to online learning and/or developing a course in the next one to two years.

Main Takeaways

The main objectives of the presentation were that faculty will:

  • Gain an understanding of the purpose and importance of “Meet the Instructor” Videos.
  • Acquire knowledge of the planning process.
  • Obtain tips and tricks for generating ideas for “Meet the Instructor” videos.
  • Gain an understanding of the filming process.

Download the Presentation Materials

You can download the Meet the Instructor: Building a Social Connection Presentation here.

You can view Nick and Bryan’s highlight reel of introduction videos here.

For even more examples of what the media services team can do, view their Faculty Showcase here.

Future Topics

Do you have an idea for a future topic that you want to see us present (or to present yourself)? Comment on this post or email me at kristin.kowal@uwex.edu!

Faculty Spotlight: Steve Dunn Interview

By Eric Peloza

Posted in: Best Practices / Faculty / Instructional Design / Teaching Online

August 13, 2019

Picture of Steve DunnThis June, I had the good fortune to sit down and talk with Steve Dunn regarding time management strategies in online courses. Steve is a veteran faculty member of UW Extended Campus’ Sustainable Management program with over six years of teaching experience. He is also partnering with the new Applied Biotechnology program. In our discussion, we covered the three phases of the course cycle: planning, development, and teaching. This blog post will discuss some of the key items that we spoke about for each phase. The main question that I asked Steve was, “If you look back at your years of experience in online education, what are some things that you would tell yourself when you first started?”

Planning

In the first part of our discussion, we talked about the shift to online education and how to approach planning for an online course. We know that the online education provides students and faculty an opportunity to view education from a different perspective. This requires a change in approach, working from the desired result and moving backwards (backwards design). In brief, backwards design is the course development process of starting with objectives, then building assessments based upon those objectives, and finishing development by locating resources that help students complete the assessments. In regard to using backwards design, Steve stated, “Beginning with the end in mind was the single hardest thing to wrap my mind around.” It is important to think ahead when planning your online course, and the backwards design process represents a shift from the traditional line of course design where development starts with a textbook and determines objectives last. If you are new to online education, it may take you some time to adjusting to backwards design, but it is a valuable process.

Along with backwards design, Steve mentioned that one of the biggest changes in the online education was working with a team on course design and development. He said that he was he was at first overwhelmed with the resources and wasn’t used to others asking questions about course design. His advice was to lean into the team approach and listen to the support. Steve said, “Recognize that you are on a team and that the team is trying to help you to make the courses so much better. Most professors are pretty busy with teaching, research, and their personal life, so the team is a big time saver.” Use your resources early and often, and don’t be afraid to reach out for advice! It can save a lot of time in development and when the course is active.

Recognize that you are on a team and that the team is trying to help you to make the courses so much better.

Read more »

Five New Twists For Online Discussions

By , Kristin Kowal
May 1, 2019

Posted in: Best Practices / Faculty / Instructional Design / Teaching Online / Tips

May 1, 2019

Introduction

The reality is that most online courses have what we call “traditional discussions,” which follow the read-write-post (and perhaps reply to a peer or two) pattern. Even if the discussion questions are interesting, both instructors and students can get tired of the same old routine. We recommend trying any of these five “twists” on traditional discussions in the next online course you work on. These activities encourage student engagement and critical thinking, and they might help you feel more connected to your students as well!

2 instructional designers surrounded by fruit, putting citrus twists into glasses of ice water
Pictured: Laurie and Kristin preparing some discussion twists to add a little zest to your course.

Twist 1: Adding Images of Examples

What is it?: For this twist, ask students to post images along with their written responses in the discussion forum.

Why we like it: It’s personal, motivates the students, and is a great way to connect at a distance. Erin Ratelis, an online instructor, said, “It not only feels different for the students, but it is also a different type of activity which will stand out for them. It leverages a different technology, and photos are a great visual tool to solidify class insights. It requires students to explore class topics through a very personal lens (no pun intended).”

Field-tested example: In Erin’s course, she asked students to go to a retail environment in their community and find ten ways that consumer marketers influence purchasing decisions. She asked students to post photos but made it optional. Many students chose to include pictures of examples, such as retail displays at Target and other stores. Students even commented directly in their posts about how much they enjoyed the assignment.

Best used for: Drawing attention to real-life examples of course concepts. Think of it as a field trip. For example, a discussion of barriers to a healthy community could include photos from students’ own communities.

Tips and tricks: It is important to remind students about privacy concerns. For example, if they are taking photos at work and sharing them, it would be a good idea to get permission first. Consider beginning the course with an activity like this to pique interest, then doing it again about halfway through the course to add some momentum.

Twist 2: External Discussion and Reflection

What is it?: This twist asks students to have a real-time, 30-minute discussion with someone (in person, on the phone, via Skype, etc.) followed by a written reflection.

Why we like it: The student needs to know enough about the subject matter to have a 30-minute discussion. Instructor Rachel Portinga commented that “Students are asked to discuss information with another person, who may not understand the [content] as well, and that could lead to the student teaching someone else, and therefore reinforcing the information they have learned.”

Field-tested example: In Rachel’s class, she asked students to have a real-time discussion with someone in their life about whether to legalize drugs such as Marijuana, Adderall, or Ritalin without prescriptions. In their posts, students summarized their discussions and shared their conclusions about whether to legalize the drug of choice.

Best used for: We especially like this twist for courses that might be hard to have traditional discussions in, like a self-paced course or program that isn’t cohort based. Think about ways you could get students to connect with community members or professionals in their field with this discussion. For example, a student in a statistics course could discuss the importance of collecting poverty rate information for the U.S. Census Bureau.

Tips and tricks: Some students might have a hard time finding someone to talk to. Remember that students can also call or Skype someone if they’re unable to meet with someone in person.

Twist 3: Debate

What is it?: For this twist, students choose a particular viewpoint on a topic. Students post their viewpoint supported by research, wait for a response from a peer with a different viewpoint, and then reply with a rebuttal. In some cases, students write a final reflection on what viewpoint they agree with (or what other information might be necessary before they can decide).

Why we like it: Crafting an argument and approaching an issue from a specific viewpoint can be motivating and fun. Online instructor Todd Wilkinson agrees, saying, “Debating with other students provides extra motivation to make good arguments and present oneself well, which are both important in this type of work.”

Field-tested example:  In Todd’s course, he picked which side students argued for on the topic of how to best support healthy behavior (more specifically, from an individual level or an institutional level). He asked them to incorporate learning resources from the lesson to support their arguments. In their posts, students supported their arguments with references and explained where they were wavering in their arguments, creating a natural feel with the back-and-forth post-and-response mechanics.

Best used for: If you have a topic where students can choose a viewpoint or a side, a debate is likely a better choice than a traditional discussion. For instance, students in an accounting course can debate the ethics of a particular case.

Tips and tricks: We highly recommend posting a “netiquette” statement as well as a schedule for the debate so there is enough time to go back and forth a couple of times.

Twist 4: Role-Play

What is it?: Students are assigned to particular viewpoints of a topic and then do some research to form and support their arguments. Then, after posting to the discussion board, students review the perspectives of their peers and write a reflection based upon information from all roles and reflections.

Why we like it: Students put themselves in another person’s shoes for a while. This kind of post can be powerful while also providing a safe place for students to explore an issue from a different perspective than their own. Instructor Rachel Portinga commented, “In general, students appear to be more engaged when you ask them to change their format (and to see an issue from someone else’s perspective).”

Field-tested example: In Rachel’s course, she asks students to consider vaccinations from the role assigned to them (e.g., the parent of a child with a healthy immune system, a college student living on campus, a doctor, a community member, or a parent of an immunodeficient child). Students crafted posts that were realistic representations of their assigned roles.

Best used for: This is a great way to provide a lens through which to explore controversial or sensitive topics with three or more perspectives. It also helps amplify viewpoints that might not often be heard. For example, students in an ecology course discussing the impact of climate change can adopt the roles of a CEO of an automobile manufacturer, an environmental research biologist, an EPA representative, a resident of Norfolk, Virginia, or a Mayor of Los Angeles.

Tips and tricks: Ask students to write their role at the top of the post to remind everyone that students are just playing a role. In one case, the instructor read an intense and very affecting post about how her student’s sister died in a car accident recently only to realize the student was being creative and playing a role instead of actually living through that particular trauma.

Twist 5: Fishbowl

What is it?: This strategy is similar to a traditional discussion, but only half of the class participates in the discussion at a time (i.e., inside the fishbowl). The other half observes the ongoing discussion while pausing to reflect on given questions (i.e., outside the fishbowl).

Why we like it: Students get to reflect on the discussion itself, which can be very enlightening and might even make them see discussions in a new way in the future. Instructor Chris Vandenhouten shared that, “Much learning takes place in observing others engaging in discussion. It allows a student to reflect on multiple student perspectives instead of selecting just one or two to review.”

Field-tested example: In Chris’s course, she asked half the class to respond to a traditional discussion question and asked the other half to observe the ongoing discussion and write a response paper including one fact learned, one surprising thing learned, their most salient takeaway, one thing they learned about themselves, and an area they might like to explore in more depth. Later in the semester, the groups switched roles.

Best used for: Switching things up a couple of times in larger classes is great for getting students to reflect on their own learning. It can also encourage students to step back to analyze the flow of the discussion. For example, students can be asked to state which positions seemed to be the most popular initially and whether this changed during the discussion (and, if so, why). Students tend not to observe the major shifts in a discussion when they are focused on addressing a particular topic, and this exercise can help them develop that ability.

Tips and tricks: Use this for at least two discussions so students can switch roles. This is best for larger classes (12+ students). The activity creates a bit more work (for example, it may require using two rubrics: one for the students inside the fishbowl and one for the students outside the fishbowl), but instructors have said it’s totally worth it.

Try one or more of these strategies and see how a little twist can add some zest to your online discussions!

Note: Laurie Berry and Kristin Kowal wrote this article based on their presentation “Discussion on the Rocks? Add a Twist of Fresh Alternatives!”. This article originally appeared in Magna publication’s Newsletter, The Teaching Professor. Link to original article: https://www.teachingprofessor.com/topics/online-learning/teaching-strategies-techniques/five-new-twists-for-online-discussions/

Demystifying Online Group Projects

By Eileen Horn, Eric Peloza
March 11, 2019

Posted in: Best Practices / Faculty / Instructional Design / Teaching Online / Tips

March 11, 2019

Introduction

Heather Herdman photo
Heather Herdman, PhD, RN

I was one of those students that always hated group projects because I invariably ended up with somebody who didn’t do their work and I figured I could do it better myself…I always thought students would feel the same way. But I was encouraged to try it out and it’s been great.

Like many students and instructors, Heather Herdman, PhD, entered into the fray of online group projects with trepidation; but, with input from other colleagues in the program and instructional designers, she made the commitment to give it a try.

We all know that students have responsibility for making group work successful and instructors have little control over what students do or don’t do, but we also have a responsibility to provide the best environment for the group work to occur. As instructors, there are things we can do to change the conditions of group work and impact the trajectory to increase the likelihood of success. Today we’re going to take a close look at Heather’s approach to this project as a way to uncover keys to successful teaching with online group projects.

You can think about your work related to online group projects as fitting into three phases: planning, designing, and doing.

Planning

An online group project that isn’t well planned is going to become an unstable learning experience. Students will be more frustrated, asking more questions and offering more complaints. This serves as a reminder that we really need to think about which course or unit objective can be met with a group project. In Heather’s graduate-level course there is a clear connection between the group project and a career in health and wellness. When we asked about the goal of the course, Heather said,

Students should be able to both analyze someone’s research and also conduct research. In health and wellness employment situations graduates will have to work with teams. They have to work with people from different departments, often with people that have very different backgrounds. You’ve got to have a way of bringing those people together. So this course’s project is kind of a nice way to introduce people to the fact that you’ve got to learn to work with people that may come at things from a very different perspective than you do.

As we dive deeper into this case, you’ll see that Heather does an excellent job of explaining this connection to students.

Spending time upfront planning and designing your group project makes it easier to implement. You make it easier for yourself to manage the course and for students to succeed. It is critical to know why the group project is part of the course, because making sure it’s really clear in your mind will help when it comes to communicating the value of the project to students.

Read more »

« Previous Page
Next Page »

Categories

  • Best Practices
  • Competency-based Education (CBE)
  • EDI
  • Faculty
  • Instructional Design
  • News
  • Projects
  • Teaching Online
  • Tips

Tags

Accessibility annotation Best Practice best practices CBE community of practice competency-based critical thinking curation development EDI Engagement engagement strategies faculty Feedback formative feedback group work idea sharing instructional approach Instructional design motivation Multimedia networking OER online discussions Online pedagogy open educational resources Professional connections project retrieval practice self-directed learner self-paced learner social presence teaching teaching model teaching online time saving tips

Instructional Design

  • Instructional Design
  • Services
    • Instructional Design Process
  • Resources
  • Meet the Team
  • Blog

Footer

Quick Links

  • UW Flexible Option
  • UW Online Collaboratives Program Catalog

Online Courses

  • Independent Learning

Contact Us

Office of Online & Professional Learning Resources
Universities of Wisconsin
780 Regent St., Suite 130
Madison, WI 53715

Phone: 608-800-6762

Fax: 608-265-9396

Copyright © 2025 by Board of Regents of the University of Wisconsin System. All rights reserved.· Privacy Policy · Sitemap · Log in